
'79-'93 FOX Mustang Under-dash ClutchTamer Install Guide...
'79-'93 FOX Mustang Under-dash ClutchTamer Install Guide...
Pre-Installation Requirements...
NOTE- our FOX underdash version is designed to work with the stronger '87-'93 "curved" style drop bracket shown below. If you have one of the earlier brackets that's made from simple flat metal bent in a "U" shape, it will need to be swapped for the later version...
IMPORTANT- you must have a clutch pedal stop in place! A very important part of getting consistent launches is to have in place a properly adjusted clutch pedal stop. It's function is to insure that the slipper's rod is always pulled out exactly the same amount every time the car is staged, so that it can consistently delay the clutch's lockup.
Step 1- Installing the Clutch Pedal Bracket...
Our clutch pedal brackets are designed to install by simply slipping them over your pedal's "arm", secured to the pedal by simple pinch bolts. This allows you to easily slide the bracket up/down the pedal for proper positioning.
...place the upper edge of the pedal bracket appx 2" below the upper edge of the bend in the pedal as shown below...
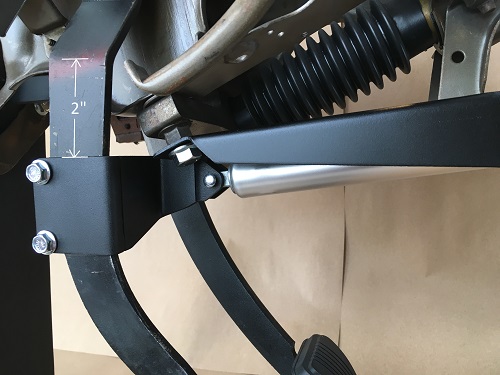
...tighten the pinch bolt to secure the bracket's position on the pedal (requires a 7/16" wrench).
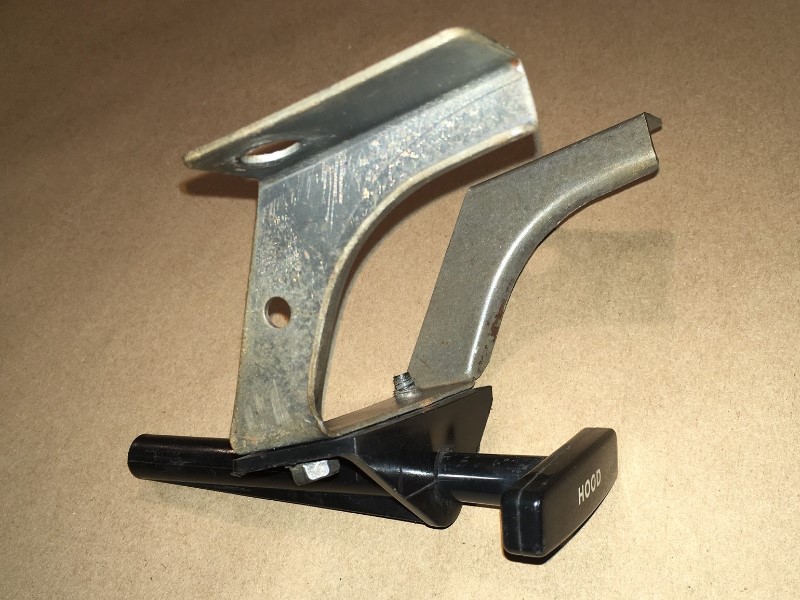
Step 2- Remove Screws Securing Hood Release to Column Bracket...
...simply remove the screws and let the hood release assy hang.
Step 3- Fitting the Dash Slide Bracket to the Column/Dash Substructure...
...install the ClutchTamer slide bracket onto the left/forward steering column attachment stud. Hold in place with the 3/8" flanged nut supplied (requires a 9/16" wrench). The tab extending from the side of the ClutchTamer's slide bracket will sandwich between the black plastic "hood release" assy and it's curved sheetmetal drop bracket...
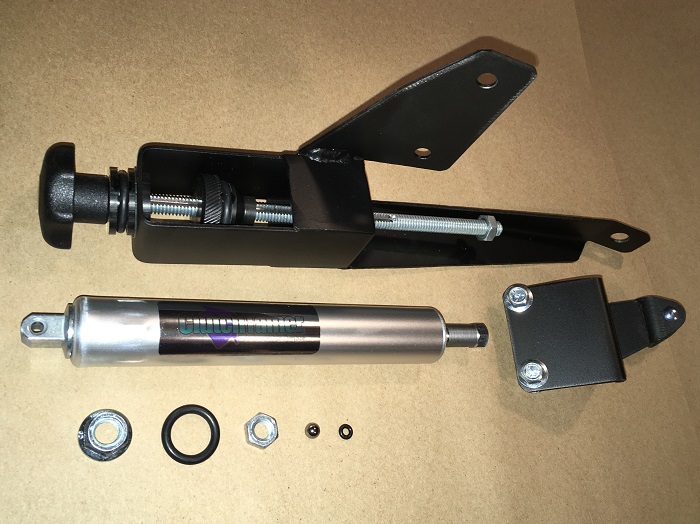
Step 4- Assembling the threaded shaft, "Initial Hit Dial", and "Lockup Delay Knob" onto the cylinder...
...thread the "long end" of the threaded rod all the way into the cylinder's shaft, then secure it in place with the jam nut.
...thread the "Initial Hit Dial" onto the threaded rod until appx 1-1/4" of the threaded rod sticks out of the flat face of the dial.
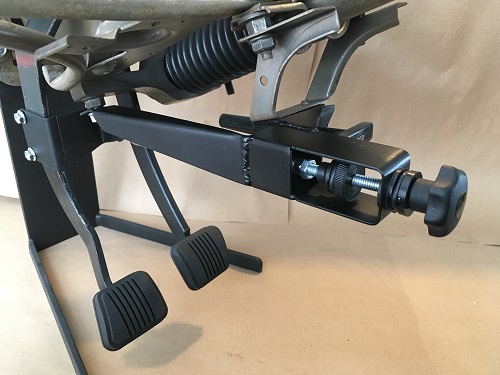
Step 5- Install the ClutchTamer's Hydraulic Cylinder assy into the Pedal Bracket...
...install the cylinder/rod assy thru the hole in the dash substructure and thru the Dash Bracket's Slide Bushing.
...secure the cylinder to the clutch pedal bracket with the provided attachment pin and o-ring retainer.
...thread the outer "Lockup Delay Knob" onto the threaded rod using one drop of liquid thread locker. With the "Lockup Delay Knob" installed properly, there should be a small gap between the "Lockup Delay Knob" and the "Slide Bushing" when the cylinder's shaft is adjusted to "0 Turns", as shown in the center of the pic below...

NOTE- if you need to remove the plastic slide bushing from the dash bracket, it just "snaps" together. Simply slip a small blade under the rear "washer" portion, with a gentle pry it should snap free from the slide bushing. A small set of pliers can be used to "snap" the washer/bushing back together for re-install.
Step 7- Initial Setup & Tuning...
...CLICK HERE to go to our "initial setup & tuning guide
If you have any questions, feel free to e-mail me