website:www.grannysspeedshop.com
'79-'85 RX-7 / Ford 8.8 Torque Arm Suspension Installation Guide
CLICK HERE for TASA conversion install FAQ
Tools & Equipment Required
Tools...
Equipment...
Supplies...
Fitting and installing the Torque Arm...
Our Torque Arms are designed to fit the nose of your differential very closely. It was fabricated and hand fitted to an actual housing in our shop to insure a snug fit. Although not required often, minor differences in castings may require additional hand fitting of the torque arm's front plate. If your torque arm fits too tightly around the pinion housing, a few seconds with a die grinder or dremel tool w/ a small carbide cutter will provide a quick remedy.
After the Torque Arm is in place on the housing, bolt it to the rear bracket using the (2) 3/4" bolts and flat washers supplied. The bolt fit will be very snug, so be careful to start them straight. Tighten them up evenly. Follow up by torquing them down to 100 ft/lbs.
Here's a list of recommended tools and equipment recommended for a sucessfull installation. All are not necessary, as you may come up with alternative ways to get it done, but this will give you a general idea of what you are in for...
...basic hand tools, both metric and SAE
...measuring tape
...3/8" drill bit
...1-3/16" hole saw
...0-150 ft/lbs torque wrench
...(4) jack stands for car
...(2) jack stands for rear axle
...personal safety gear such as gloves, safety glasses, etc.
...die grinder
...1/2" hand drill
...blue Loctite
...penetrating oil
...chalk
...gear oil
...friction modifier (for TracLoc or other clutch type limited slips)
Removing your RX-7's stock rear axle...
Prepare for rear removal by raising the car about 18" off of the floor, properly supported at the OEM jacking points. Notched jackstands are preferred to prevent damage to the welded seam.
Installing the Torque Arm's front yoke assembly...
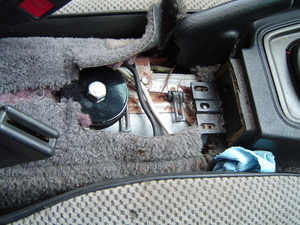
Remove your car's center console.
Using a carpet knife, split the carpet and pad so that they can be pulled back to reveal the top/center of the tunnel. Although the pics below show the pucks already installed, they also show how far the carpet needs to be split...
...After safely and securely supporting the car, the remove the rear tires.
...Remove the driveshaft.
...Remove the brake calipers from the rear, leaving the hoses and e-brake cables attached, then hang the calipers from the body with wire to prevent damage to the hoses.
...Remove the rotors from the axles. Save them for possible use later.
...Remove the bolts attaching the sway bar end links to the chassis.
...Remove the bolts/nuts from the watts linkage bars where they attach to the chassis.
...Support the rearend housing by placing a floor jack under it's center.
...Remove the bolts attaching the rear shocks to the rearend housing
...Remove the bolt/nut from the axle end of the upper control arms
...Remove the bolt/nut from the axle end of the lower control arms
...Slowly lower the entire rearend housing about 6-8 inches, until the springs come free from their seats.
...Remove the coil springs.
...Lower the entire rearend housing assembly and remove it from under the car.
...The (2) front screws are accessed by gently prying up the rectangular tray insert just behind the shifter.
...The (2) rear screws are located inside the rear of the compartment under the center armrest.
 -
-
Next, it's time to drill some large holes in the sheetmetal under the carpet for the Torque Arm's front yoke. The front hole is located first, at a point in the center of the tunnel about 2-3/8" to the rear of the e-brake handle's mounting bolt. The rear hole is located in the center of the tunnel at a point about 12-3/4" to the rear of the front hole. The center-to-center distance between the holes should be 12-3/4". Draw a large "+" thru the center of the holes, so that as the hole is being drilled, you will be able to make sure that the hole is not walking off-center.
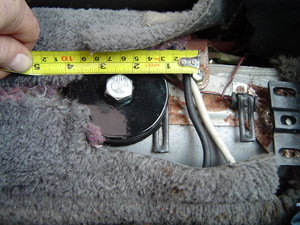
Drill or die-grind both holes to a diameter of 1-3/16", the size of the rubber puck's pilot diameter.

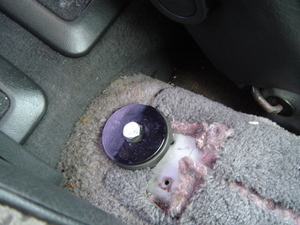
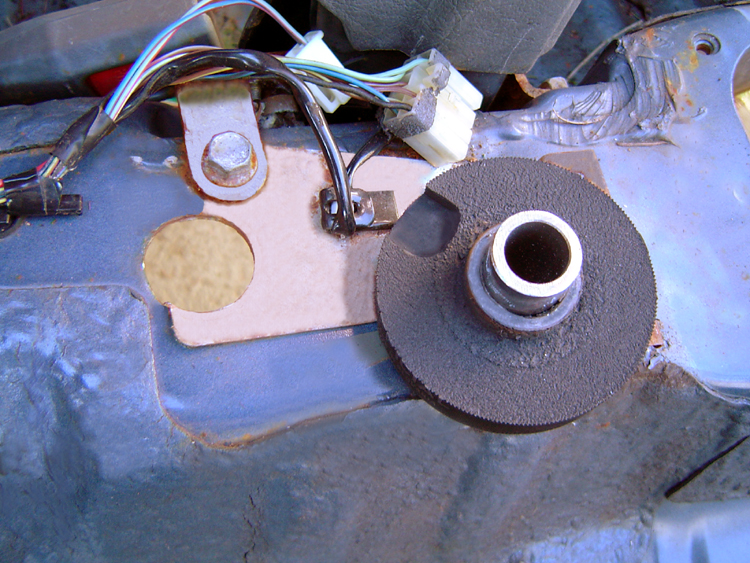
Position the upper rubber pucks, pilot tubes, bolts, and 3" dia flatwashers over the holes, with the rubber pilot extending thru the hole. The front puck has a notch machined into it, which provides clearance for the e-brake bracket's rear bolt.
 .
.

Place the rear lower rubber puck into position from the bottom side of the tunnel, over the rear bolt, with the machined slot in the rubber facing down with the e-brake cable passing thru the slot. Push the puck up onto the pilot tube extending down from above, which will hold it into place.
 .
.
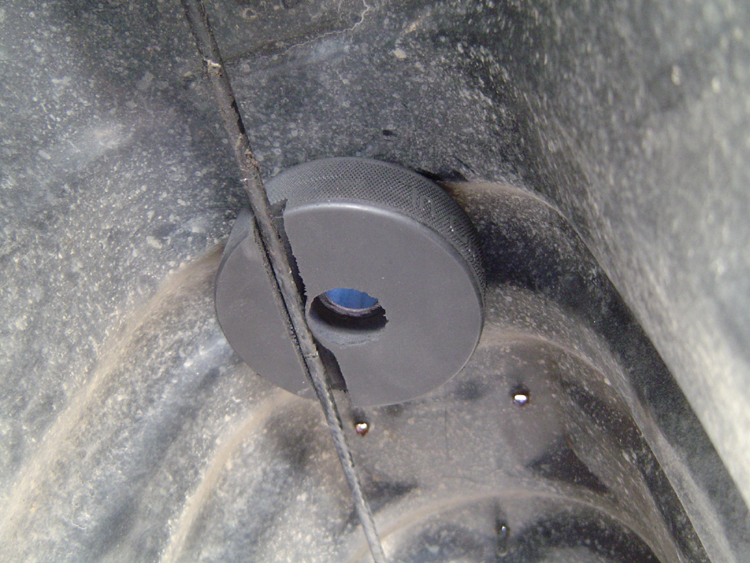
Push the front lower puck into position from below. Push the puck up onto the pilot tube, which will hold it into place.
 .
.

Install the remaining yoke assembly from the bottom, over the bolts. Using the 1/2" flangeloc nuts provided, tighten both bolts to 60 ft/lbs.
 .
.

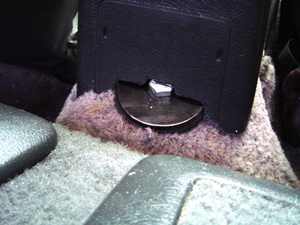
Your center console will require trimming to clear the rear rubber puck and washer before it can be reinstalled. Here's a pic of the finished work, it's the only visible indicator from inside the car that our Torque Arm Suspension has been installed...
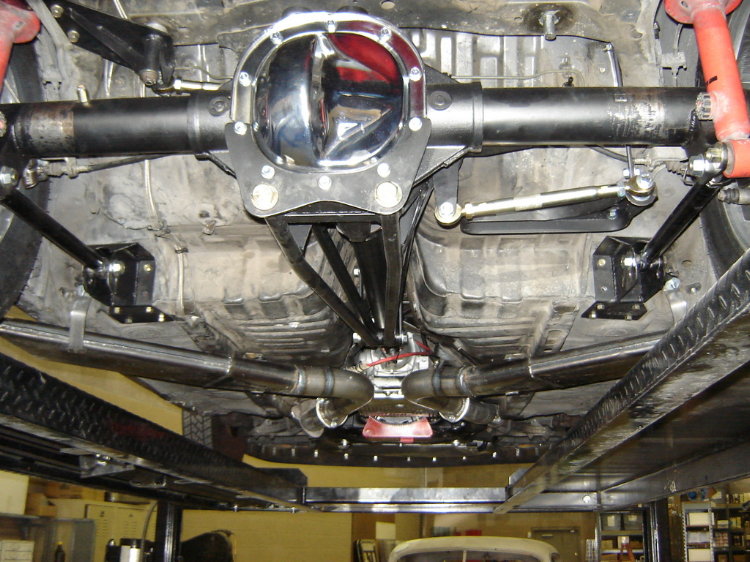
Finally, 8.8 meets RX-7...
Slide the 8.8 rear with torque arm into place under the car. Use a couple of jack stands to support the axle tubes near their final location. Pull the nose of the torque arm up into place, where it can be temporarily supported by pinning it, with a bolt, to the yoke plates hanging down from the front yoke assembly.
If you are using the stock lower links from a '79-'85 RX-7, install them using their original eye bolts and nuts.
If you are using our larger rod-end style adjustable lower links, there are a few extra steps to ensure proper assembly...
Insert the spacer bushings into the rear shock's lower mounting holes, then slide the lower shock eyes into position between the brackets attached to the axle tubes. Install the bolts w/ washers & flange nuts, torquing each to 60 ft/lbs.
Installing the driveshaft...
This step is often overlooked, but before installing the driveshaft, be sure to grease both u-joints. Also, to protect the output shaft's rear bushing and seal, be sure to lube the slip yoke with some light oil before inserting it into the transmission.
Temporarily pull the bolt holding up the nose of the torque arm, allowing the torque arm's nose to be lowered for driveshaft installation. With the nose of the torque arm lowered, slide the driveshaft into the transmission.
Bolt the rear of the driveshaft up to the flange or yoke.
Pull the nose of the torque arm back up into position, between the two side plates hanging down from it's front yoke assembly. Slide the 5/8" bolt into place from the passenger side. Install the washer and self-locking nut. Torque the bolt/nut to 90 ft/lbs.
...adjust each bar so that both it's ends extend from the tube an equal distance.
...install the link on the car with the left hand thread end on your left when you are facing it. This will make it easier to remember which end has the left hand threads later when you are trying to make adjustments.
...Each rod end will be spaced to the center of it's bracket using two cone shaped spacers, one on each side of the rod end. The larger side of the spacers face away from the rod end, against the inside of the bracket.
...insert the gr8 bolt, washer, and nut thru the bracket, spacers, and rod end from the outside. Install a 5/8" flange washer on the inside, and torque to ????? Repeat for the rear ends of the links.
......If your 8.8 has a flange, torque the (4)12mm x 1.75 pitch (25mm long) pinion flange bolts to 60 ft/lbs ea.
......If your 8.8 has u-bolts, tighten them to a guesstimated 25 ft/lbs ea.

Installing the watts linkage and centering the rear...
Few are aware that the typical stock '79-'85 RX-7 rear is offset in the car. You can walk up to a random car in a parking lot, slip your fingers between the tire and fender, and it will likely be much closer on the driver's side. It's almost as if Mazda designed their rear to be offset to the driver's side. We are not sure if they designed it that way or not, but for our purposes, we want the rear centered so that we can fit the largest tire possible with the maximum clearances for both sides. This also allows us to change the bar's configuration to better fit over our 8.8 rear's larger centersection. If you are using our fabricated watts linkage, we've already done this for you. If you are using the stock watts bars, we need to do a little modification to the bars themselves to make everything fit better. The easiest way we have found is to simply cut the ends from the oem bars and add custom "sleeves" to their center to correct their length and offset. We supply "watts sleeves" that are bored out to a slip fit over the cut-off ends of the stock bars. After the correct lengths are determined, you simply remove the bars and take them to a shop for final welding.
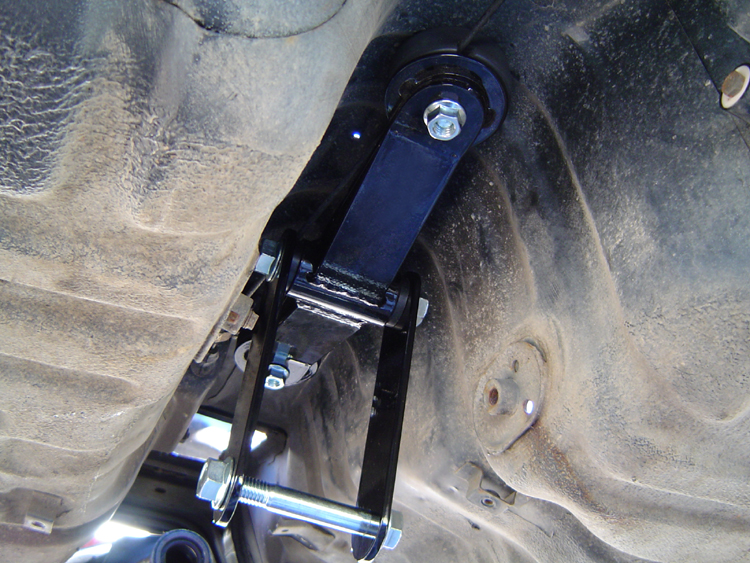
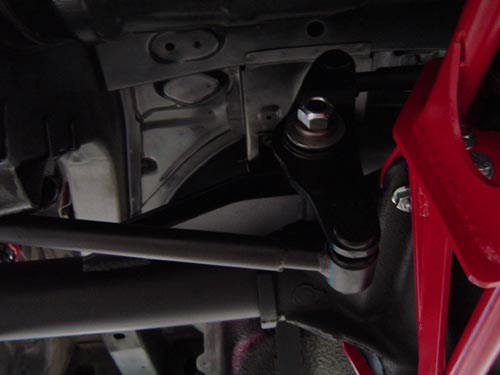
The picture below shows, installed, a modified stock watts linkage from a 1st gen RX-7. Note that the rods have been sleeved as described above...
...STEP 1-...With the bellcrank's studs facing rearward and the longer arm extending downward, slide the watts bellcrank over the large stud that's welded to the right side axle tube. Install the large flatwasher and self-locking nut provided.
...STEP 2-...With the tires/wheels installed and the rear at ride height, center the rear so that you have equal tire/fenderwell clearances on both sides of the car.
...STEP 3-...Cut the ends from your stock watts rods. Leave a 2" long portion of the centersection attached to each end, which will slide into our watts sleeves to make your new rods. When finished w/ this step, you should have (2) rod ends that are straight, and (2) rod ends that are angled.
...STEP 4-...Install the angled rod ends into the long watts sleeve, then install the bar in position above the rear on the left side of the car.
...STEP 5-...Install the straight rod ends into the short watts sleeve, then install the bar in position below the rear on the right side of the car.
...STEP 6-...Adjust the rod lengths until the bellcrank arms are vertical.
...STEP 7-...Mark or measure the required rod lengths, remove them, and have them finish welded.
...STEP 8-...Paint and re-install the modified watts rods.
If you are using our fabricated watts linkage, the supplied threaded bars are easily adjusted to center the rear under the car.

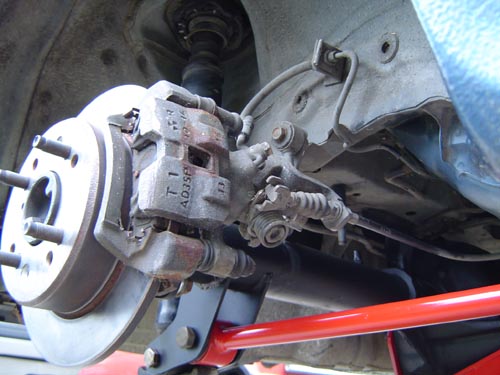
Installing the brakes and e-brake cables...
If you are using the original RX-7 brakes, this step is pretty basic, just bolt them up to the supplied brackets. Be sure to check for clearance between the rotor and any brackets or bolts that may come in contact with it.
Final inspection and safety check...
Periodic inspection and maintenance...
Keep a watch out for oil leaks from your rear, especially from it's rear cover. Not only can a leak cause component damage from low oil level, it also may indicate loose cover bolts that play a critical part in anchoring the rear of your torque arm.
 ...Click Here for Ordering Information...